


It’s not quite summer yet in North Idaho, but the mosquitoes haven’t gotten the memo.
Thanks to a very rainy spring, they’re out in force right now and they’re HUGE! We have positively prehistoric-sized mosquitoes this year and they all seem to have babies to feed.
My herbal apprenticeship spent this week out in the woods, learning about identifying conifers, digging up and processing arrowleaf balsamroot… and feeding the mosquitos.
I’m amazed at how the little buggers got through thick denim jeans and multiple layers of fabric. No joke — if I have 1 mosquito bite, I have 100 of them… And I’m not one of those people who gets a little spot that goes away in a day or two, all my bites turned into huge, angry red welts and they’ll likely stick around all week. Es no bueno.
Fortunately for my itchy self, I developed a recipe for an effective bug bite remedy a couple summers ago. This Sting Stick has been a life saver. Make it before you need it — it’s an excellent helper to keep handy in your herbal first aid kit to deal with all kinds of stinging insect bites, including mosquito and fly bites, bee/wasp stings and even splinters. In a pinch, I’ve even used it to help dry up a blister and bring a pimple to a head. (Not that I EVER get pimples mind you 
 )
)
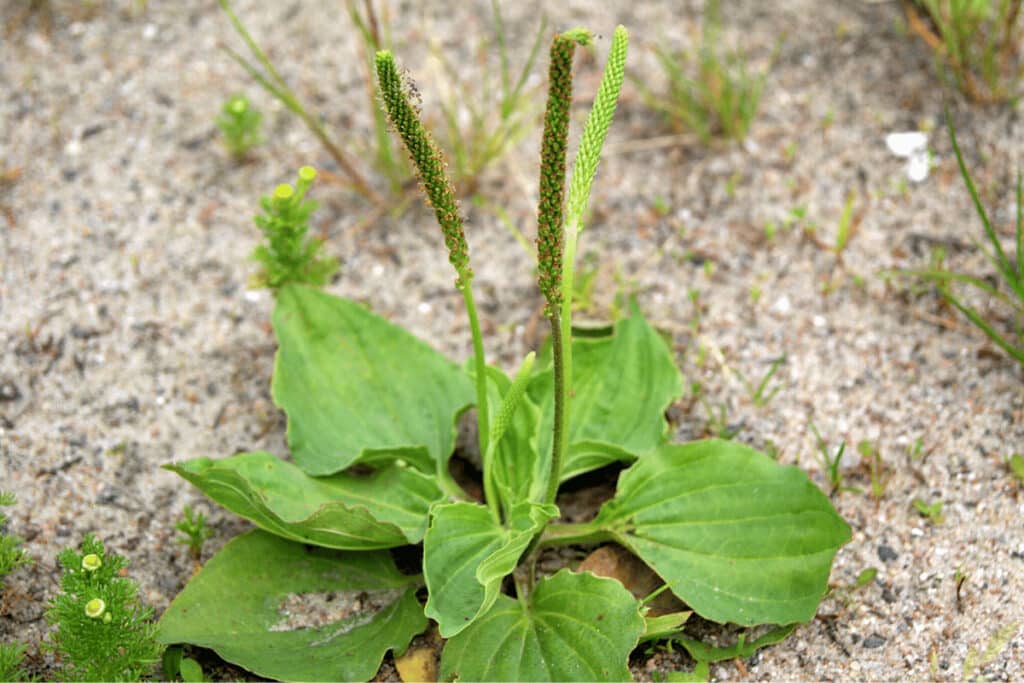
Plantain
Like many new herbalists, plantain was one of the very first herbs I learned to identify and use. I learned early on that a spit poultice made from the fresh leaves is a miracle worker on a wasp sting sustained on a hike. Plantain is an excellent all-purpose drawing herb, meaning it will work to draw out the venom or stinger from an insect bite/sting or foreign objects such as splinters in short order. And since plantain is energetically cooling, it also works to relieve “hot” conditions such as itchy bites, stings or rashes. It also has antihistamine properties that will help take down the itchy swelling.
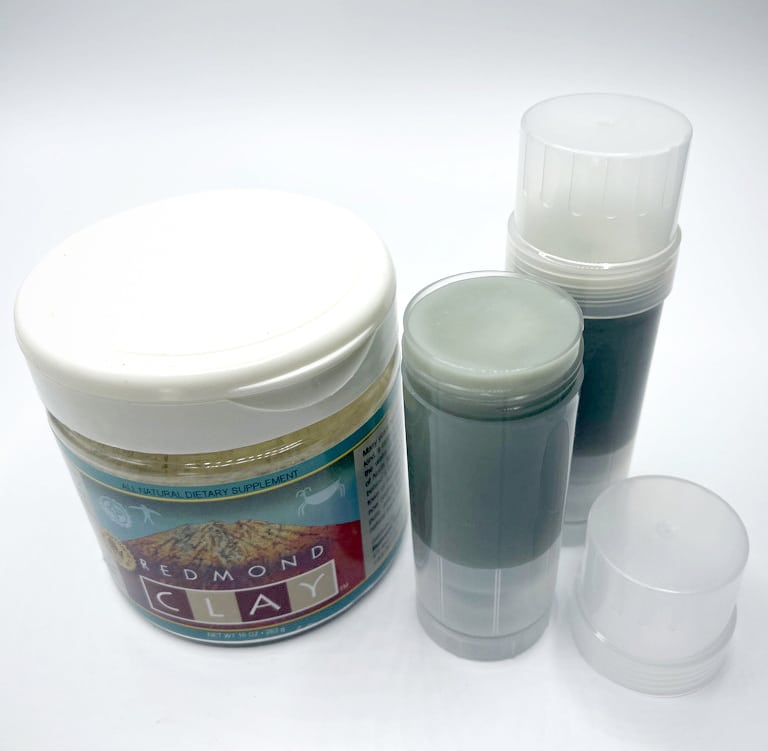
Herbal Sting Stick
Ingredients
14 g jojoba oil, self-heal infused
10 g cera bellina or beeswax pastilles
12 g bentonite clay
25 drops clove essential oil
Instructions
- Infuse your tallow and jojoba oils following the procedure for an alcohol intermediary oil infusion. Barely moisten the herbs with a shallow layer of 151-proof grain alcohol and allow to sit overnight before proceeding with a normal oil infusion.
- Using a gentle heat source, warm the tallow, jojoba and wax until completely melted and liquid.
- Add clay and essential oil and stir until blended and just beginning to increase in viscosity. You want the mixture to be slightly thickened when you pour it into the tube so the clay will be held in suspension and not sink to the bottom.
- Carefully pour mixture into your storage jar, deodorant tube or chapstick tubes.
- Allow to cool completely before capping. You don’t want condensation introducing water into your formula ♥
Notes
I recommend glass containers for storing homemade lotions and potions. Glass doesn’t leach chemicals and it’s easier to clean/sterilize after the product is used up and you’re ready to refill.
If you do choose to use a plastic container, be aware that essential oils tend to react with plastic, so even if you can get it “clean,” your container will likely not be reusable.
You can avoid that annoying “sinkhole” from forming in the middle of the stick by filling the tube *not quite* full, and allowing that to set for 15-20 seconds or so before topping up. Wait a bit longer for larger tubes. You may need to return your mixture to your heat source while you wait, so it doesn’t solidify too much to pour. You can also repair a sinkhole with a hot blow dryer or heat gun. Remelt the top just enough to fill in the hole.
One Response
This is an excellent post, so much so that I subscribed to learn more from you! I’m disappointed, though, that I read it when our first frost (Middle TN) is upon us. I’d already infused fresh plantain into olive oil & ran across this post in my search for a bee sting/bug bite stick recipe. After reading your post, I guess I’ll need to wait until next growing season to make an effective stick.