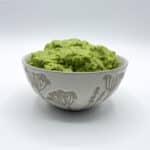
Got Garlic Scapes?

I just love garlic scapes! They add visual interest to a vegetable garden with their whimsical, Dr. Seussian spirals. ♥

But while they look charming and I’m always a bit sad to cut them off, removing the curly green stalks dramatically improves the development and flavor of the garlic bulbs forming below the soil.

If left unchecked, garlic scapes would eventually develop small bulbils that signify the end of the garlic plant’s growth cycle. By snipping off the scapes, you redirect the plant’s energy towards producing plump and flavorful cloves rather than investing in the reproduction process.

There’s another reason to remove the scapes… They’re delicious!

Growing & storing hardneck garlic

In my neck of the woods, we grow Allium sativum ophioscordon varieties, commonly known as hardneck garlic, which thrives in our cooler northern climate (USDA plant hardiness zones 1-5). It’s well-suited for regions with cold winters and actually requires a period of about 10 weeks of cold dormancy (called vernalization) in order to develop properly.

Softneck garlic varieties (Allium sativum sativum), on the other hand, are more suitable for climates with relatively mild winters (growing zones 5-7 with a few cultivars suitable for zones 8 and 9). This is the type of garlic most commonly found in grocery stores, thanks to its longer storage life. Softneck garlic prioritizes robust bulb formation over scape production, so you typically will not see a scape form on softneck garlic.

Garlic of all varieties do best in well-drained, fertile soil. Before planting, prepare the soil by adding organic matter like compost or well-rotted manure to improve its structure and fertility. Lack of potash (potassium) is a common soil deficiency that can cause weak stems, reduced disease resistance and poor bulb formation. Inadequate phosphorus is another common problem that can lead to slow growth, weak bulb development and delayed maturity. 

An easy and inexpensive way to amend your garlic bed soil is to spread a light layer of ashes from a wood-burning fireplace or wood stove. Make sure only hardwoods were burned (e.g no lighter fluids, fire starters, etc.) and take care not to overdo it, since wood ash is alkaline and too much can raise soil pH.

Avoid amending excessive nitrogen, as it can promote leafy growth at the expense of bulb development.

Hardneck garlic is typically planted in the fall, around 4-6 weeks before the ground freezes. This allows the garlic cloves to establish roots before going dormant for the season. In northern climates, this is usually in September or October.

Break the bulbs apart into individual cloves, ensuring each clove has its protective papery skin intact, and plant with the pointy end facing upwards. The recommended planting depth is around 2″ below the soil surface. Space the cloves 4-6″ apart in rows, with approximately 12-18″ between rows.

Garlic does best in full sun. Choose a location in your garden that receives at least 6-8 hours of direct sunlight daily. Garlic prefers consistent moisture but does not tolerate waterlogged conditions. Water your garlic plants regularly, especially during dry spells, but be cautious not to overwater, as this can lead to rot. Soaker hoses and drip watering systems work really well here. I’ve tried several brands over the years, and I seriously love my Snip-n-Drip system.

Around late spring or early summer, the scape will emerge from the center of the plant. It starts off as a straight, elongated stem, but as it grows, it begins to coil and twist, creating its distinctive curly-q shape. Scapes should be removed from the garlic plant when they have formed a curly or looped shape, but before they fully straighten out and become stiff. Failure to remove the scapes can result in up to a 30% reduction in bulb size!

Garlic scapes have a relatively short season, so you have to be paying attention. Timing is important to ensure optimal flavor and tenderness.

The bulbs of hardneck garlic are usually ready to harvest by mid-summer. As the garlic plants mature, the lower leaves will naturally start to turn yellow and brown. Once about half of the leaves have turned yellow or brown, it’s a good indication that the garlic is ready for harvest.

After harvesting, gently brush off any excess soil from the garlic bulbs, but do not wash them. Leave the outer skin intact. Allow the garlic bulbs to cure in a dry, well-ventilated area with good air circulation. A shaded spot such as a garage, shed or covered porch works well. Hang the garlic in bundles or place them on a mesh screen (an old window screen works great) to allow air to circulate around them. Avoid direct sunlight, as it can cause the garlic to spoil sooner. Allow the garlic to cure for about 2 to 3 weeks or until the skins become dry and papery.

Once the garlic bulbs have fully cured, it’s time to trim them for storage. Use clean pruning shears or scissors to trim the roots and remove the dried-up stem, leaving about an inch of stem attached to the bulb. Avoid removing the outer papery skin, as it helps protect the cloves during storage.

Store your cured garlic bulbs in baskets, mesh bags or paper bags with holes punched in them. You want to maintain airflow while protecting the bulbs from excessive light. Place the bags in a cool, dry area out of direct sunlight, such as a pantry, root cellar or basement. Inspect your stored garlic periodically for any signs of mold, rot or sprouting, and remove any that show signs of deterioration to prevent it from affecting others.

But I digress… back to scapes!

Cooking with scapes

From stir fries and salads to soups and spreads, garlic scapes add their own unique twist! 

(see what I did there?)

The flavor of garlic scapes might be described as a combination of garlic and a hint of fresh ‘greenness’. Unlike garlic bulbs, which have a strong and pungent flavor, garlic scapes offer a more subtle and milder garlic taste that doesn’t overpower other flavors in your cooking.

  • Garlic scapes can be sautéed or stir-fried and served up as a vegetable side dish.
  • Use garlic scapes as a garnish to add a pop of color and flavor to your dishes. Finely chop them and sprinkle them raw over salads, omelets or grilled meats for a touch of freshness — the same way you’d use chives or green onions. In Asian cultures “green garlic” is used in the same manner as scallions.
  • Grilling or roasting will bring out garlic scapes’ natural sweetness and develop a lovely smoky flavor.
  • Add scapes to soups, stews or broths for an extra layer of flavor.
  • Pickled or fermented garlic scapes are a great way to preserve their freshness and enjoy them throughout the year.
  • Mince garlic scapes and incorporate them into a compound butter to add a delightful garlic flavor with a hint of fresh herbal notes to crackers, crusty bread, fish or steak.
  • Garlic scape pesto makes a fun and flavorful alternative to traditional basil pesto. Use as a spread on sandwiches, toss it with pasta or use it as a dip.
Scape constituents

Unlike garlic cloves, scapes do not contain significant amounts of allicin, a compound that is credited with many of the health benefits associated with garlic.

That said, scapes contain many other sulfur compounds that are responsible for garlic’s distinctive garlicky odor and health-supporting properties. These compounds include diallyl disulfide, diallyl trisulfide and allyl methyl sulfide, among others. These organosulfur compounds support the body’s sulfate transport system and are known for their antimicrobial, antioxidant and potential cardiovascular benefits.

Garlic scapes also contain flavonoids such as quercetin, kaempferol and apigenin, which are plant pigments with antioxidant properties. These compounds have been associated with potential anti-inflammatory, antiviral and anticancer activities. Garlic scapes also contain phenolic compounds, including caffeic and ferulic acids, which are known for their antioxidant and anti-inflammatory properties.

They’re are also a good source of vitamins, minerals, and dietary fiber. Garlic scapes contain vitamins C and K, as well as minerals like manganese and selenium. They also contain inulin, a type of dietary fiber that acts as a prebiotic. Prebiotics nourish the beneficial bacteria in your gut, promoting a healthy gut microbiome and supporting digestive health!

Too much of a good thing?

While it’s true that garlic scapes are generally milder tasting than cloves, the intensity of their garlicky flavor can vary depending on factors such as the specific variety and growing conditions. Flavors can also become quite concentrated in a 100% garlic scape pesto recipe like this one. Avid garlic connoisseurs will be in heaven, but if you find garlic scape pesto a bit strong for your tastes, there are things you can do to balance out the flavor.

Try mixing it with other ingredients to dilute the intensity. You can blend your pesto with additional fresh herbs like basil for a more traditional tasting pesto — or try something more neutral tasting like spinach or lambs quarters to temper the garlicky flavors. Introduce a creamy component like Greek yogurt or sour cream. Adjust the ratios to achieve the desired flavor balance.

Or instead of using the pesto as a main ingredient, consider using it as a flavor enhancer or seasoning. Add small amounts to soups, stews or sauces to give them a lovely garlicky kick. You can also mix a spoonful into salad dressings, marinades or dips to infuse them with a bold garlic flavor. Try adding a spoonful to your next batch of hummus!

If you’re planning to use the pesto as a pasta sauce, try blending it with another milder sauce to tone down the strong flavors. Combine your garlic scape pesto with a more neutral or creamy sauce, such as a simple tomato sauce or a white wine sauce to create a balanced and flavorful pasta topping.

Cooking or roasting the pesto can also help to mellow out the strong garlic flavors. Sauté the pesto in a pan with some butter before adding it to your dish. This will not only reduce the pungency but also develop a deeper, richer flavor profile. 

Print
clock clock iconcutlery cutlery iconflag flag iconfolder folder iconinstagram instagram iconpinterest pinterest iconfacebook facebook iconprint print iconsquares squares iconheart heart iconheart solid heart solid icon

Garlic Scape Pesto


5 Stars 4 Stars 3 Stars 2 Stars 1 Star

No reviews

Ingredients

Scale

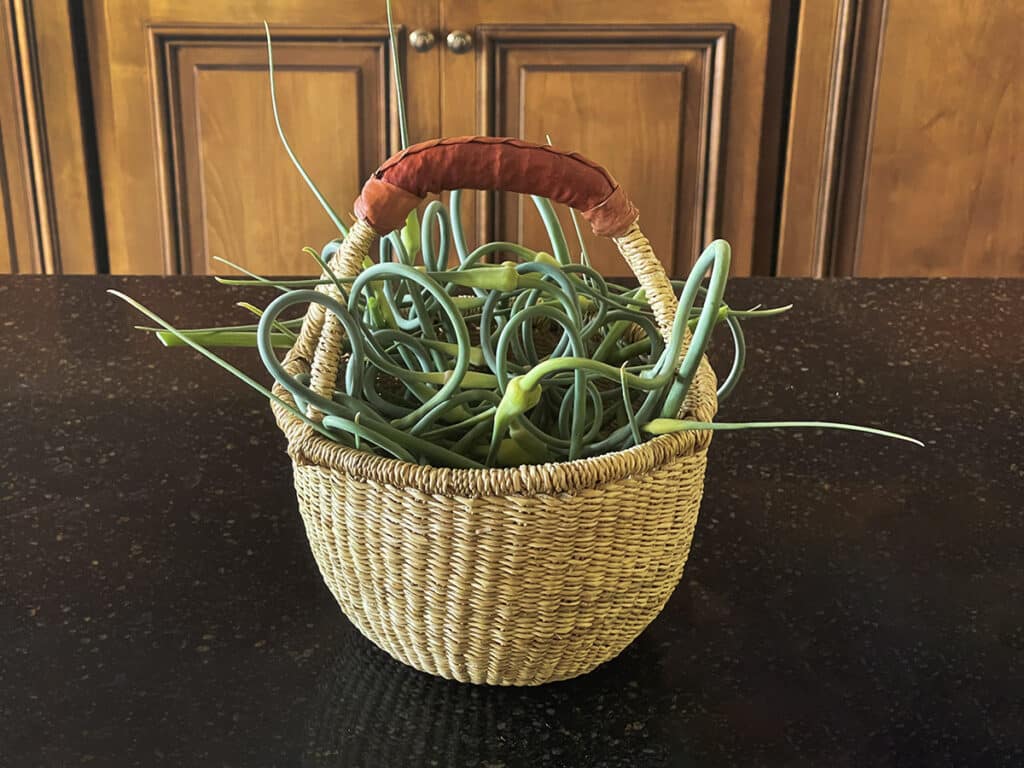
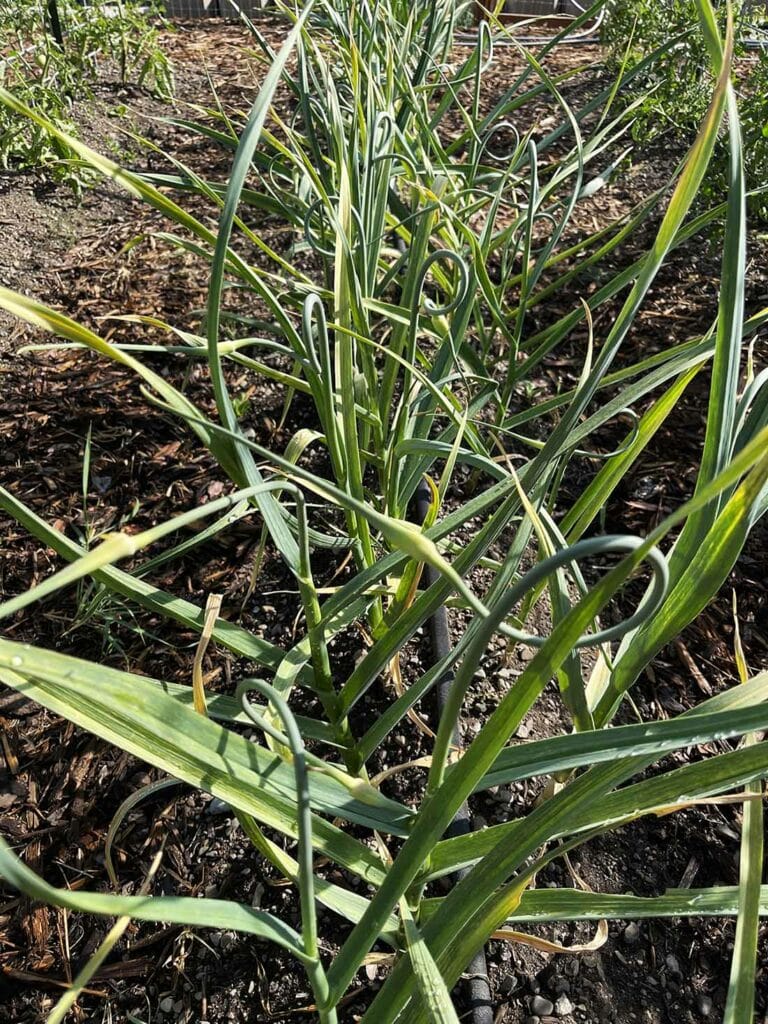
1/2 lb fresh garlic scapes

1/2 tsp fine high-mineral salt

1/2 large lemon, peeled and seeds removed

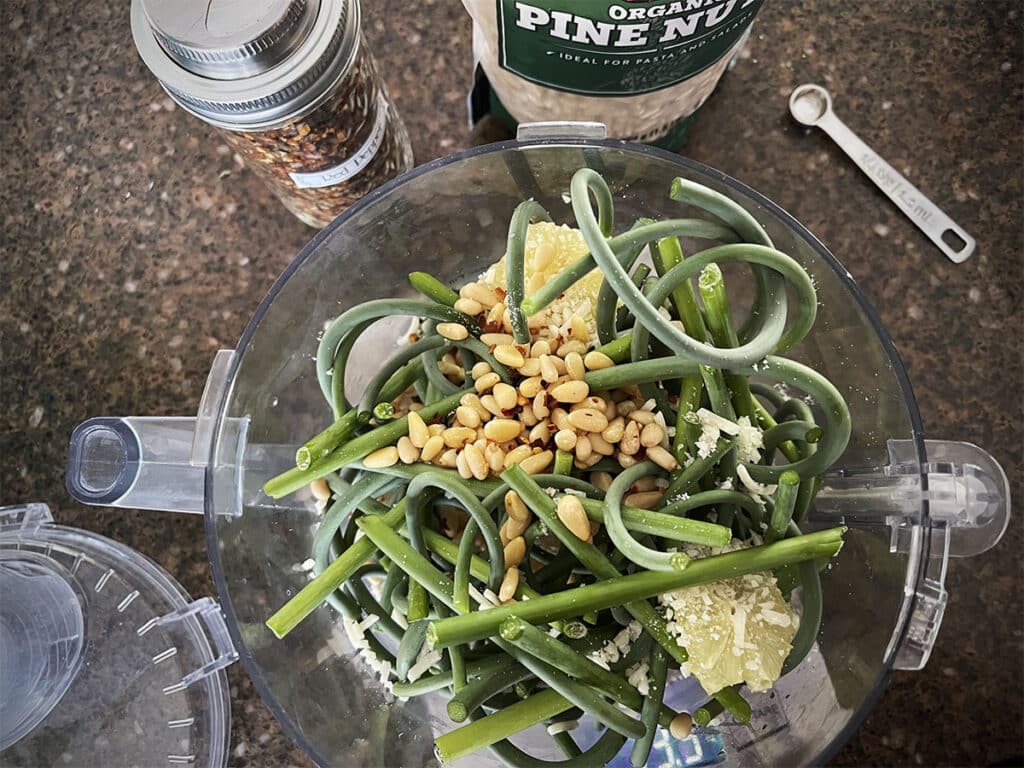
1/3 c pine nuts or walnuts, soaked

1/3 c parmesan cheese, shredded

1/8 to 1/4 tsp red pepper flakes (optional)

1/4 c olive oil


Instructions

  1. Improve the digestibility of the pine nuts (or walnuts) by soaking them. Place pine nuts in a small bowl along with 1 teaspoon of salt. Cover with warm water and soak at room temperature for 7 hours (or overnight). Strain and rinse well.
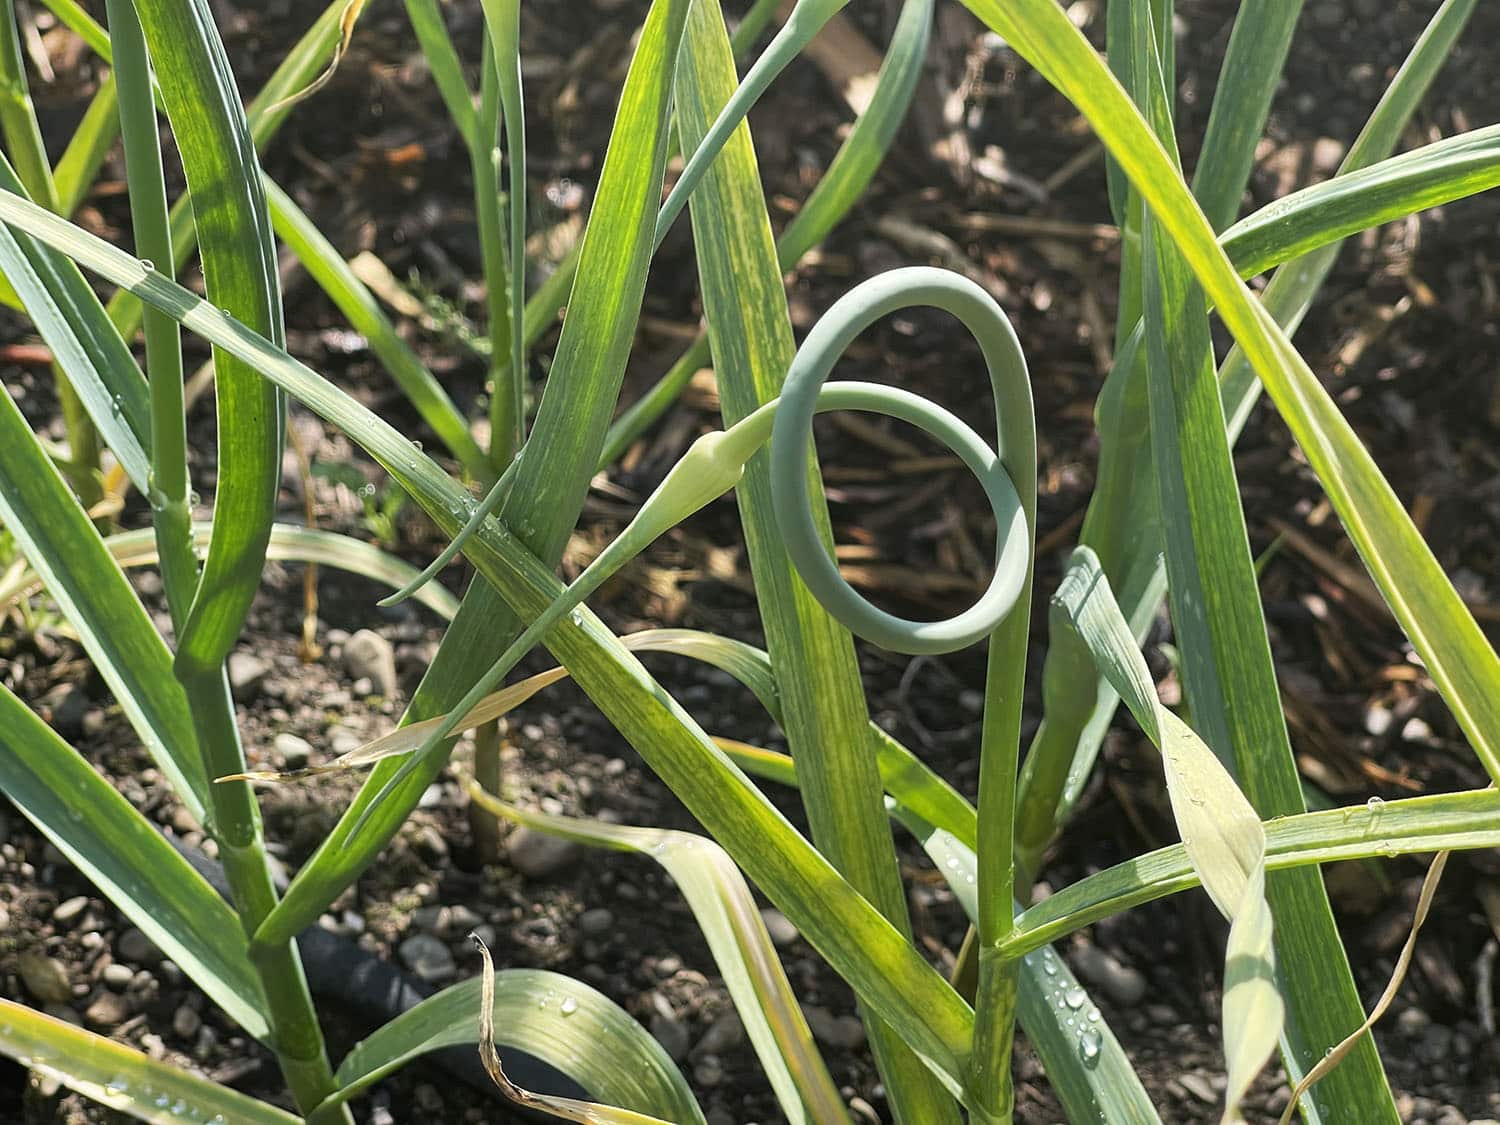
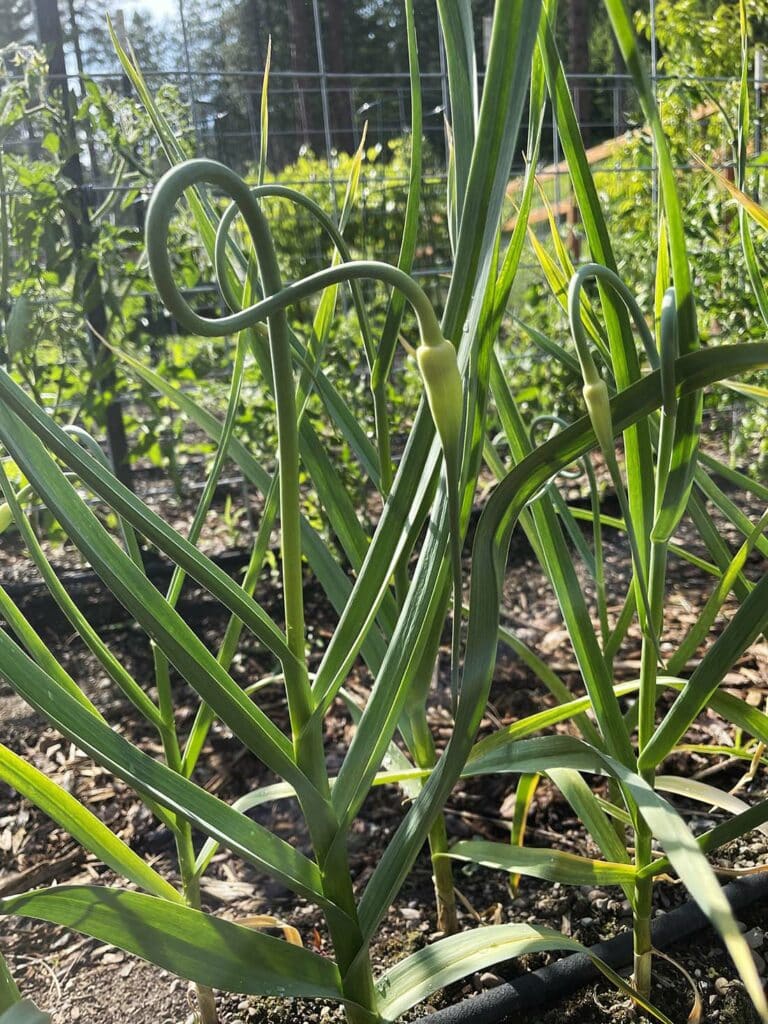
  2. Wash and trim the ends and bulbs from the scapes.
  3. In a food processor, combine all ingredients and blend until smooth. Scrape the sides with a spatula to keep the pesto from building up on the sides of the bowl. Add a bit more olive oil if needed to keep things moving.
  4. Taste and adjust the seasoning as desired. If you prefer a thinner consistency, you can add a bit more olive oil.
  5. Transfer to an airtight container, and refrigerate for at least 30 minutes to allow the flavors to meld together.

Notes

Can be refrigerated for up to 3 weeks or frozen indefinitely.

For less garlicky pesto, try incorporating fresh herbs such as basil, spinach, parsley or cilantro. The herbs will add their own unique flavors and help temper the strong garlic taste.

Disclaimer:

I’m committed to only recommending products and companies that I’m passionate about, that I personally use and trust. The content on this site may contain affiliate links. If you decide to purchase items through these links, I receive a small commission at no cost to you. These commissions help cover our operating costs to keep Redheaded Herbalist running. Thank you for your support! ♥

The content on redheadedherbalist.com is for educational and entertainment purposes only. It is not intended for medical advice, diagnosis or treatment. Claims made on this website have not been evaluated by the Food and Drug Administration.

Ready to join the conversation? 

Please be courteous! Spam and abuse of the comment section will not be tolerated.

Leave a Reply

Your email address will not be published. Required fields are marked *

Recipe rating 5 Stars 4 Stars 3 Stars 2 Stars 1 Star

Tincture Dilution Calculator

Calculate the volumes of any two alcohol proofs to create a tincture of a particular strength.

Copyright © 2024 Redheaded Herbalist

contact a

redheaded

herbalist